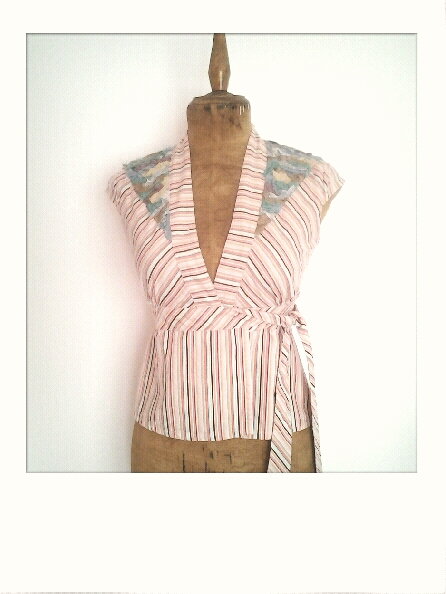
Sown Paintings

January 4, 2013

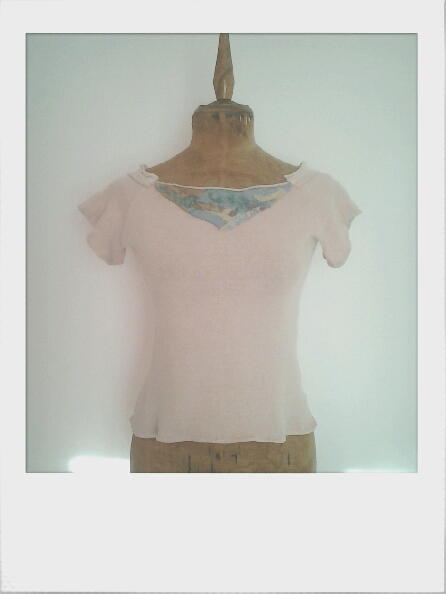
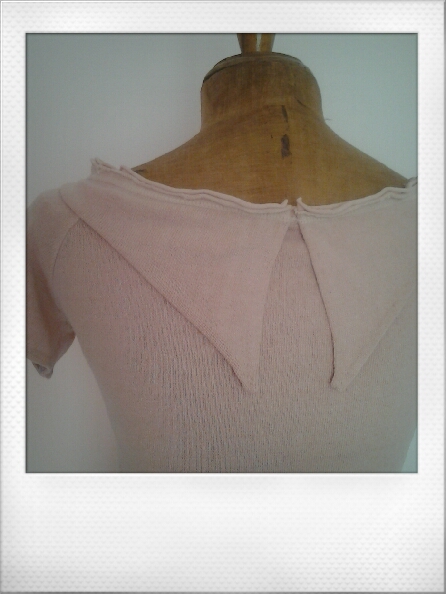
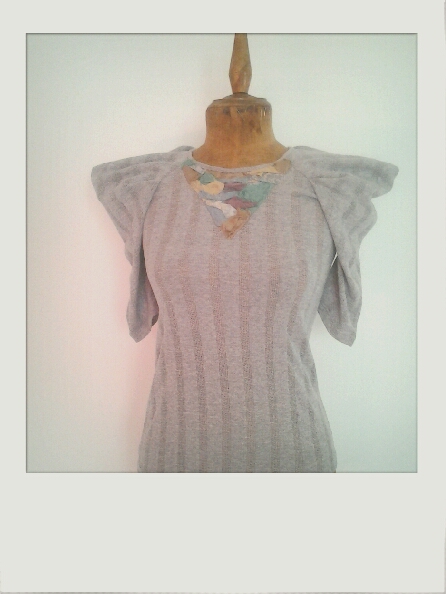
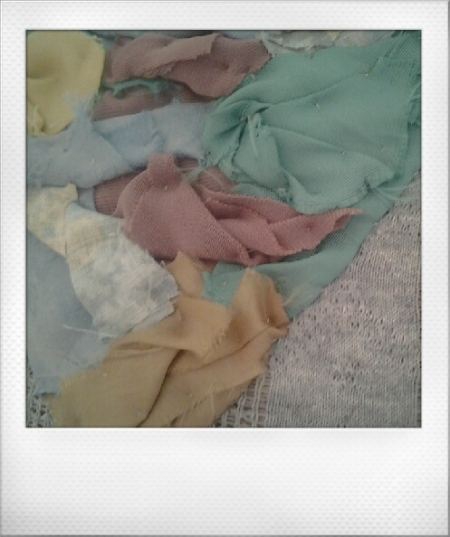
He cosit set quadres. A mà. No hi ha gaire concepte, tant sols la raó per la que vaig deixar Belles Arts. No és pintura, són teixits, i perquè no? El que més m’agrada és que cadascú hi veu el que pot o vol. M’encanta. M’han dit que semblen paisatges i el mar. I això està molt bé perquè a més són coses que m’agraden tot i que jo mai ho hagués dit. El que més veig és textura. També he descobert després d’acabar’ls que m’agraden juntets. I anar jugant a fer rodar els cercles.

sown

My latest paintings, hand – sown. There’s no real concept. I just wanted to work with pretty fabrics instead of using paint and a paintbrush. That’s why I left Fine Arts. Did I ever mention that sewing is calming and soothing? I particularly like the fact that everyone sees something in them within their possibilities. I love that. Someone said landscapes and another, the sea. And they’re both things that I trully adore, nothing is more beautiful than nature. I personally prefer them together, I can keep spinning them round. And then I can play not just with the colour but with the textures in the composition.

MMVV

September 30, 2012

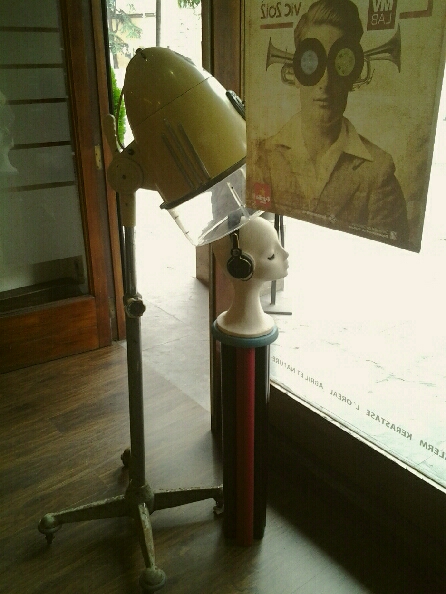
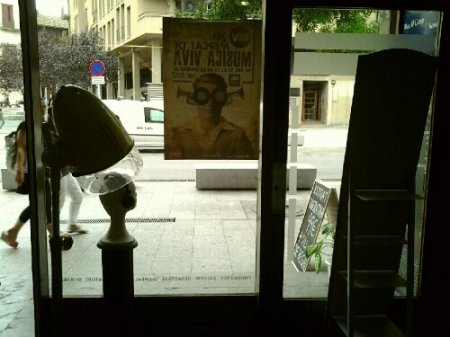
Segon aparador…aquesta vegada vam xerrar després d’una partida de “family party” i gràcies a tots va sorgir aquesta idea. Queda lleig dir-ho però va ser rapidíssim. Gairebé tot reciclat. Per cert, música viva canvia molt després de nen. Em vaig perdre Dorian…ja porto dos concerts, aquest i Die Antwoord. Quan bebe sigui gran m’acompanyarà i ballaré recordant la meva joventut mentres ell fa veure que no ha vingut amb mi. Tornant a l’aparador, tant simple com inspirar-se en el cartell. Heu de pensar que per tot Vic les botigues van penjar vinils als aparadors, així que no era una opció. I m’encanta mostrar aquests petits tresors que tenen amagats a Nou Grup. Per cert, ara comença una suuuper promoció: un 50% de descompte en la teva segona visita…com? Doncs entrant i emportant-te una targeta. Agafa i guarda-la bé, a partir de la primera visita té dos mesos de caducitat!

image

image

image

New shop window specially designed for this year’s MMVV (Vic’s Live Music Market). Although it’s not so much a market as perhaps a type of festival thingy. Live music everywhere. The best stuff is free, the crappier groups you have to pay to see. I missed Dorian, a band I listen to and sing along to in really loud volume and very high pitched tone. This is the second concert I miss with tears in my eyes that I can recall, so I have decided that when my bebe is old enough he will come with me to these concerts, even if he pretends he doesn’t know me when I’m dancing away, remembering  when I was young”er”. Back to the design…this time I was helped by family after playing “family party” and am proud to say that most materials used are recycled. It took no time to set up. Most shops in Vic hung vinils in their shop windows and we have to be different, of course. By the way…if any English readers want to come over there’s a suuuper offer, 50% off on your second visit. You just need to pop round, grab a card and bring it on your first visit. And you mustn’t lose it because it expires afte two months!

Collar necklace D.I.Y

August 16, 2012

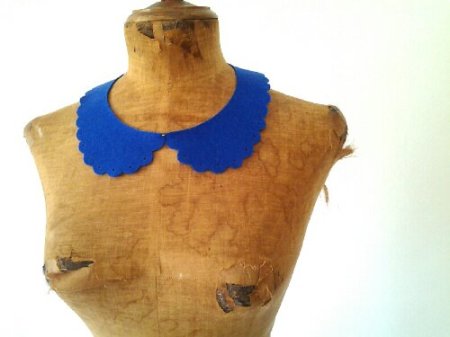
This is a cheap, simple and sweet D.I.Y. I’m sure you’ve seen collar necklaces EVERYWHERE…but you haven’t seen mine! I chose and choose peter pan collars over any collars because they suit my face and style much more than the rest. And I make mine from felt because it’s cheap and simple. No sewing. Seriously, I bought five different colours and could have made them all in one aftenoon but it’s not baby compatable so I took slightly longer.

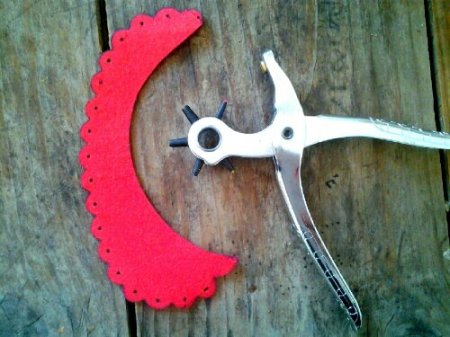
1. Trace round an existing collar of yours (or go and buy a necklace, trace the shape and take it back, like I did…er, I did tell you I’m a stylist…buying things and taking them back is in my blood.)
2. Make any changes you want and cut out. Use thick felt for this one because it’ll be your template. I added half circles all the way round mine and then punched holes out, extra sweet.
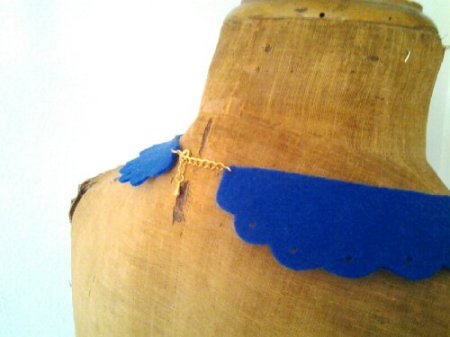
3. Get necklacing! Buy felt,fold, trace round the template, cut it out, punch holes and you’ll end up with two matching pieces. Put them down, mirror like and link them together using whatever you already own. Then do the same with the back. I used a set I had in gold colour. Then I added a liiittle bit of superglue so that the felt wouldn’t fray. Do this underneath, just in case. I used a needle to make super tiny holes before attaching anything. My advice is you place the necklace on a mannequin of somesort when doing this because you don’t want the ends to lift up or it to look asimetrical.

And now, have fun! I love my necklaces because they cost near nothing, needed no sewing and completely change any tops I wear. My favourite is white but you’ll find that it’s so easy that it’s worth making them out of any colours you can find because it gets really fun to play with. I’ll post some combinations soon when I get a chance.

image

image

image

Aquest D.I.Y és super simple i super dolç. Sé que ja haureu vist mil i un d’aquests collarets però no heu vist els meus! Els meus són molt especials perquè estan fets amb feltre i no s’ha de cosir res i giren menys que d’altres! Vaig comprar feltre de tots els colors, sempre mirant que no fos gaire gruixut perquè tot i que el meu preferit és el blanc, són tant fàcils de fer que val la pena tenir-ne de tots colors per poder jugar. Ja veureu que transformen qualsevol samarreta, rebeca…m’encanten. Heu vist que he escollit el cuello Claudia? A mi és el que em queda millor (per la forma i l’estil) però podeu utilitzar el coll que més us agradi.

1. Calqueu sobre un feltre rígid utilitzant un coll que ja tingueu o podeu anar al Pul and Ber, comprar un, calcar i tornar com jo. (És algo que fan moooltes estilistes, o sigui, que sense vergonya). Només un costat.
2. Feu canvis si voleu. Jo vaig dibuixar mitjes rodones al voltant perquè fos més dolç i vaig fer foradets també. Vosaltres mateixes.
3. Doblegueu el feltre, calqueu, retalleu i feu els forats. Ajunteu les dues meitats utilitzant el que volgueu i tingueu a casa. Jo vaig fer servir tanques daurades. Poseu també una mica de loctite per sota perquè sigui més resistent el feltre i feu els forats amb una agulla, serà més fàcil afegir les tanques. Si teniu un maniquí treballeu amb ell perquè us assegurareu que no s’us aixequi el coll i que caigui ben simètric.

A que és fàcil? Es pot fer tot en una tarda (si no teniu un bebe com jo). Aviat Quan pugui penjaré fotos per ensenyar-vos exemples!

Dara

July 4, 2012

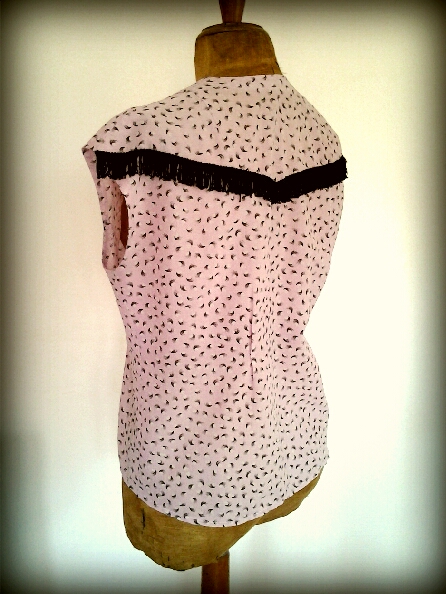
A vegades ens enamorem d’un teixit i quan trobem una peça per 50c. s’ha d’aprofitar…per aquest D.I.Y només necessites una camisa que adoris, uns botons i una mica de serrell. Jo he escollit botons i serrell negre però pots jugar molt amb els colors.

1. Si la teva peça encara no és una camisa, converteix-la! Jo li vaig tallar tota la part d’abaix.

2. Ara canvia els botonets. Jo he escollit un de més gros primer i els altres més petitons. Això va a gustos. Crec que encara els tornaré a canviar perquè he trobat uns de negres i daurats que m’agraden mooolt. Concentra’t en cosir els botons bé i en ser pulideta (diane). I també fixa’t tant en el tamany dels anteriors – si has d’obrir i tancar la camisa – com en el pes dels botons i de la tela.

3. Ara posa’t la camisa i mirant – te al mirall posa una agulla allà on vols que vagi la punta del serrell. Quan te l’hagis tret, medeix el centre i fixa el serrell amb agulles que vagin des d’un ombro cap a la punta i pujant cap a l’altre ombro.

4. Ja pots cosir (jo ho he fet a mà) mirant de ficar els extrems cap a dins perquè quedin ben amagats.

5. I ara ja la pots portar!

Jo recomano que aquestes cosetes les rentis a mà però si no tens temps de mimar la teva roba has de saber que et pot durar poc…Si no acostumes a fer-ho prova-ho! Ja veuras que a més de relaxar-te, prenent un temps per tu i només per tu, acabaras estimant molt més la teva robeta. Si és que es pot. Ah i per cert, si mireu Pepi, Luci, Bom y ótras chicas del montón veureu que surt aquest mateix vestit; juraria que és el mateix. Ho vaig veure després del D.I.Y… 😦
image

image

image

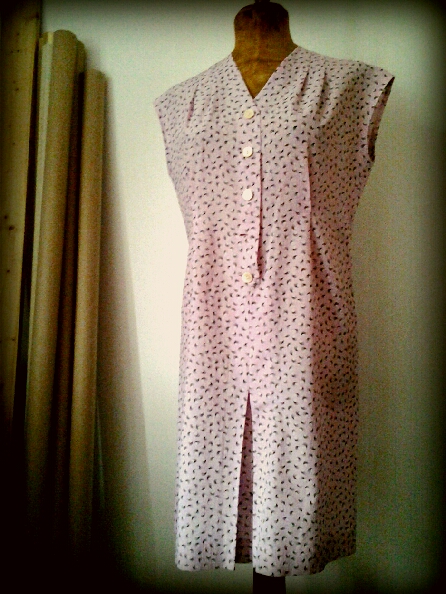
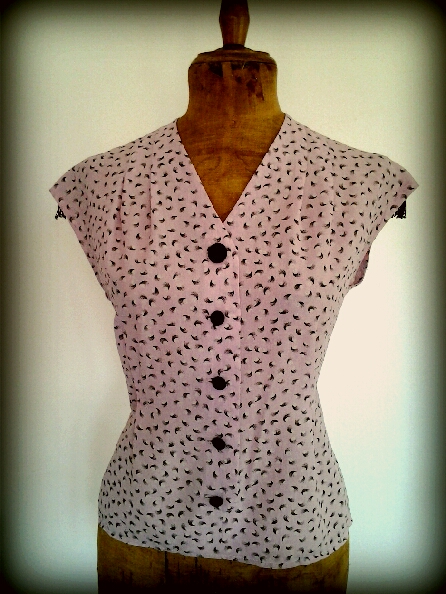
Don’t you just love when you’re walking around a second hand market and you come across a fabric you had been fantasizing about? I bought the dress, yep, my ideal fabric came in the shape of a dress, for just 50c. I was a happy girl. So, this a simple D.I.Y and all you need is fringe. (I think that’s what you call it, but please let me know if I’m wrong!). The basic steps are:

1. If like me you are starting out with a pretty dress, chop the bottom off. I made the front slightly shorter than the back…

2. Get them buttons changed! Choose ones that are the same size as the originals (if you need to actually button and unbutton the shirt to get it on) if like me you have a small head you can choose different sized ones. I put a bigger one on top.

3. Put your shirt on and stick a needle where you want the pointy angle to go. Take it off and measure where the middle of your back is. Now, with these two measurements you know where the angle will be. So take the fringe, start at one shoulder, go down to reach the angle and then go back up to reach the other shoulder.

4. Sew! Make sure the ends are tucked in and well hidden. I didn’t use a machine on this, it was easier to just hand sow.

I strongly recommend that you hand wash all D.I.Y’s. I love handwashing my clothes (not all) because it’s my little perfumed moment when I can almost meditate and it makes you love your clothes EVEN more. They appreciate it, I promise. Oh and if you’re looking for a fun film to watch check “Pepi, Luci,Bom and Other Girls on the Heap” by Almodóvar. I was watching it the other day and screamed when I this dress come out, it looks exactly the same…I had already D.I.Y’d it 😦

A flor de pell

June 28, 2012

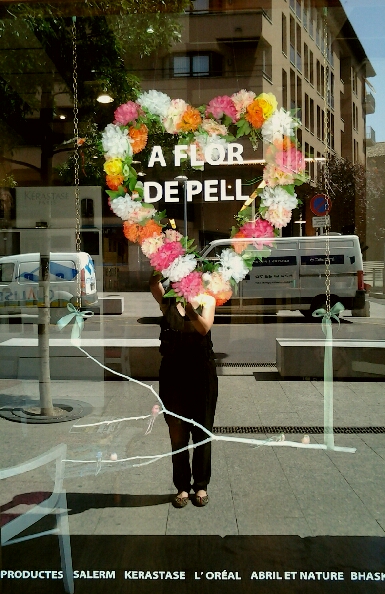
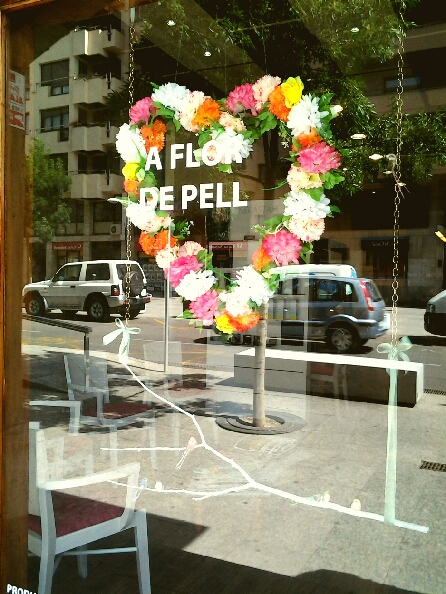
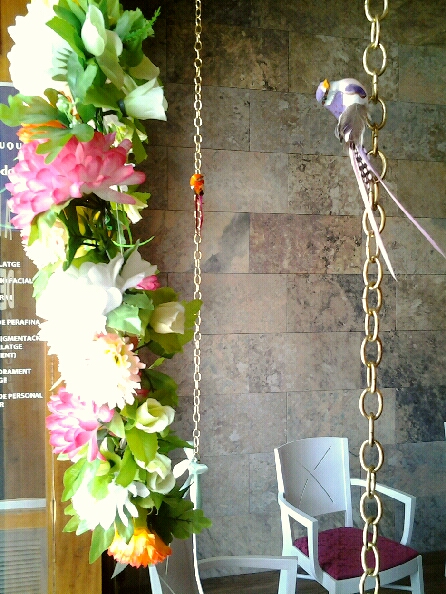
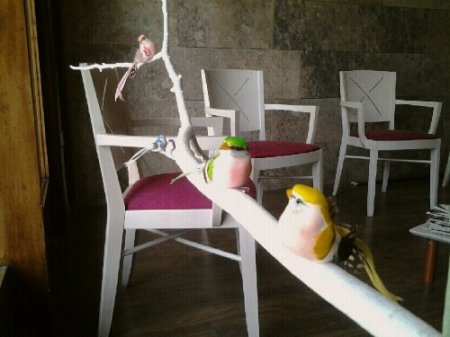
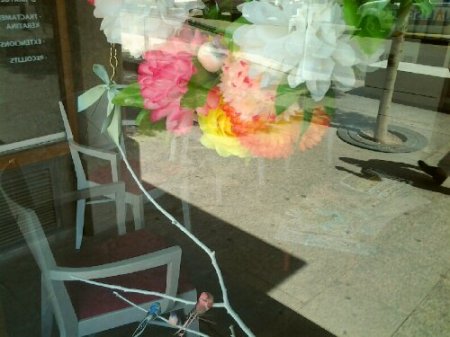
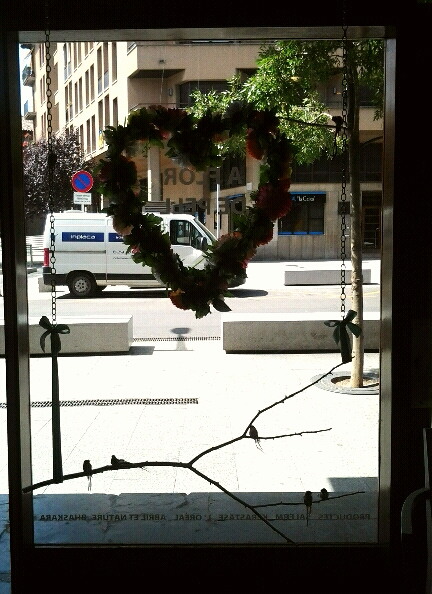
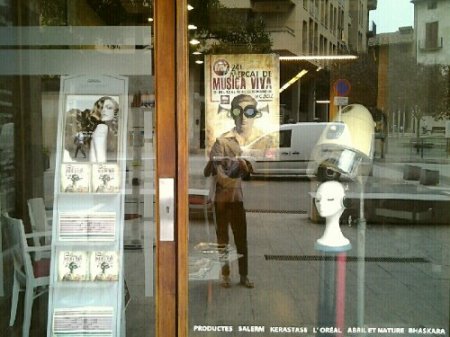
El primer aparador amb la perruqueria NouGrup de Vic.  Volia treballar amb text i en català. Volia transmetre frescor, alegria i romanticisme. Em sembla interessant que un aparador de perruqueria no estigui ple de productes de perruqueria…mmm…potser m’estic carregant la primera norma de l’aparadorisme (?!?). Bé, des de fora es pot llegir unes dues vegades la paraula “perruqueria” així que vaig optar per un muntatge més creatiu, a mi aquest tipus de propostes m’atrauen molt més i em desperten curiositat. Aprofito per dir que si podeu, entreu. A dins trobareu un equip super-pro, simpàtics, carismàtics i bastant guapets. A mi em pentinen (i jo crec que ho fan mooolt bé).

image

image

image

image

image

image

Here’s my first shop window for Nou Grup Hairdressers in Vic. I reeaaally wanted to do something different, I get reeaaally bored of looking at interesting arrays of shampoos and hair products in hairdresser’s windows. I mean, the point is that it should make you want to go in, right? Their number one goal shouldn’t be to make you desire the latest conditioner. So, I wanted to work with text, in catalan (it’s our language…yep, I know we’re in Spain, but we’re not Spanish) as I firmly believe that when we come across writing we can do nothing other than read. “A flor de pell” comes from the french “à fleur de peau” which is something like “close to the skin”, to have sensitivity towards something. It’s used in Catalan to express being passionate, having feelings or emotions and not being able to hide them. And “flor”is also “flower” so therefore, the flowers. I hope I’ve explained it well. Sort of. Just about? May I also say that the small team behind the scenes are the cutest! So if you’re thinking of coming to Vic pop in and say hello but be quick to leave before they get their scissors out! Ah, and it’s also where I get my hair done!

Things I cannot say but I can do.

June 4, 2012

Coraline

April 3, 2012

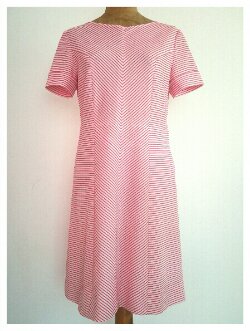
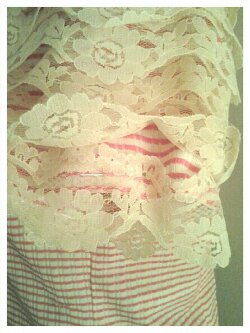
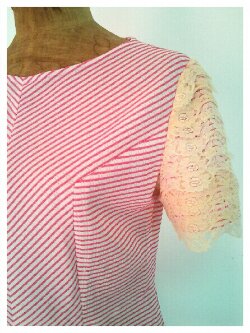
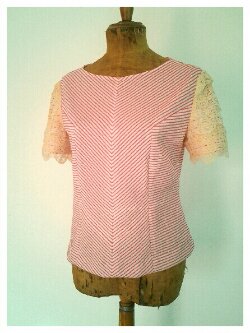
Per aquest D.I.Y necessites puntilla i una samarreta, camisa…que t’agradi.  El que faras es cobrir la maniga existent amb la puntilla. Jo he escollit un vestit que vaig comprar per un euro al que li vaig tallar la part d’abaix. Seria interessant jugar amb els colors que escullis, per exemple, si ets pel roja comprar puntilla de color vermellos, si ets rossa, de color crema i si vas tenyida negre, negre. Llavors podries escollir qualsevol to pastel pel cos. Un salmo o verd menta millor aquesta temporada. Si ets castanya, qualsevol color et funcionara.

1. Comenca desde abaix. Posa la puntilla de forma que no sobresurti la maniga per sota i que la junta quedi a la costura sota el brac.
2. Puja i posa la seguent, solapant. Ves pujant fins arribar a dalt.
3. Comenca a cosir (jo ho he fet a ma) i quan arribis als trossos que toquen la sisa retallal’s amb estissora per despres cosir. Si utilitzes una puntilla barateta et sera molt mes facil.
4. Segurament arribaras a dalt i et quedara un espai per acabar mes etret que la puntilla, cap problema. Posa un trosset al teu gust i amb gust perque es vegi ben acabat.
5. Listo! Ja tens un top molt mono, original i teu!

image
image
image
image

What you will need for this D.I.Y is a top  and some lace. And basically it’s all about covering the sleeves in  lace…easy! I used a dress I bought for one euro, chopped the bottom off and voilà. It was indeed a pretty dress but after having a baby looked quite crappy on my figure…anyway, I would  also add that I think you could have fun playing with the colours you choose for the lace. For example, if you’re ginger, you could try buying a similar tone, if you’re blonde you could buy a creamy colour (like the one I used) and if you have black hair, black lace. Then you could pair it with a pastel top  -salmon and mint for this season-  and if you are brunette, use whichever colour you like best. Let’s begin…

1. Starting from the bottom, place the lace so that it overlaps the sleeve and hangs over. You must start AND finish under the arm.
2. Now go up and keep doing the same thing, placing one slightly over the other until you reach the top.
3. Now you can start sewing. I didn’t use a machine for this. When you reach the armhole seam just cut the lace and then sew. If you use a cheap kind (like I did)  chances are it’s going to be plasticky so it won’t fray with wear.
4. When you reach the top you’ll probably find you’re left with a thin bit to attach your lace onto, no problem, add your lace overlapping so that it looks cute.
5. Done! You now own your very own original and sweet D.I.Y lace top! Congratulations!

Barika

February 22, 2012

image

image

Basha

February 22, 2012

image

image

Barnardine

February 22, 2012

image